Driving Chaos Vehicle

Import Mesh and Texture: Crab the model and texture into Browser


Car already rig and skin
FBX import Options:
Skeletal Mesh: turn on
Combine Meshes: If you have many separate mesh, you could turn on
Plugins:
ChaosVehiclesPlugin

WheeledVehiclePawn

Create BP:
Right click mouse > Blueprint Class
All Classes:
search: vehicle
Select “ WheeledVehiclePawn ”

Mesh > Skeletal Mesh Asset > car

Camera
Left side > +Add > SpringArm and Camera
Setup camera target Arm Length: 600
Camera Settings:
Turn off:
Inherit Pitch
Inherit Yaw
Inherit Roll
Camera Collision:
Probe Size: 0
Do collsion test: Turn Off

Wheel Setup
Select Vehicle Movement Component
This car has four wheels so Press 4 times to add
Wheel Setup > Wheel Setups > +

Go to Skeleton and copy bone name
Select the bone > right click > Copy selected Bone Names

Paste to Wheel setups index bone name

Engine Torque Setup
Vehicle Movement component > Mechanical Setup

Two options can create Torque curve

Option1: Double click to show the Torgue curve window

The graph's X axis represents the engine RPM (revolutions per minute)
The graph's Y axis represents the engine Torque output in NM (Newton Meters)
Total Tougue : 300
Add curve points in 300
Shift + left click mouse : Add points
Curve like image

Option 2:

Right Click mouse > Miscellaneous > Curve

Pick Curve Class: CurveFloat
Add Keys

Go to BP_Car
Vehicle Movement component > Mechanical Setup
External Curve > select curve

Chaos Vehicle wheel Blueprint
In most cases, you will require at least two wheel types per vehicle.
A wheel that is affected by the steering / engine / handbrake, and one that is not.
This may be the case for having differently sized wheels for the front or the back
Create wheel BP:
Blueprint Class > ChaosVehicleWheel

Create front and rear wheel BP

Double click BP_Front_Wheel
Setup
Wheel > Axle Type : Front
Affected by Handbrake: Turn Off
Affected by Engine: Turn on
Wheels setup
Max steer Angle:45
Affected by steering: Turn on

Double click BP_Rear_Wheel
Setup
Wheel > Axle Type : Front
Affected by Handbrake: Turn on
Affected by Engine: Turn on

Go back to BP_Car
Update wheel setups class

Turn on Simulate Physics

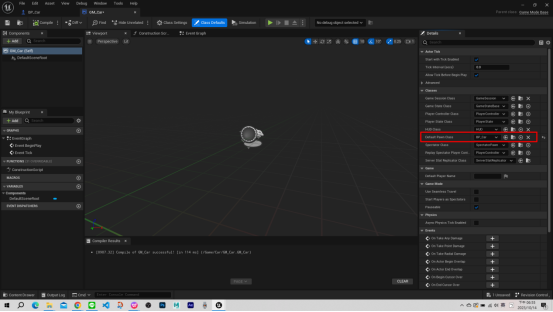
Game Mode

Default Pawn Class: BP_Car

World Settings
Window > World Settings

Game mode
GameMode Override: GM_Car

Play Game result

Car Physic

Select physic and delete
Because the default physic shape is not fit for the car

Select wheel bones > Primitive shape: Sphere >Add bodies

Select Root bone > Primitive shape: Single convex Hull >Add bodies

Control camera rotate
Open BP_Car

Using mouse to rotate camera
Mouse X Axis Value ---> Delta Rotation Z
Mouse Y Axis Value ---> Delta Rotate Y

Play Game Result:
Discover the car is not on the ground.

Go to BP_FrontWheel and BP_RearWheel change “ wheel radius ”
Wheel Radius: 20

Result:

Vehicle Movement

Input Action
Project settings

Go to Engine - Input

Action Mappings: HandBrake --> Spacebar
Axis Mappings:
Thottle --> W
Brake --> S
Steering --> A , D

Go to BP_Car
Each InputAsix to connect
Vehicle Movement

Animaton
Obtain the behaviors we want for our vehicle.
Select car skeleton > right click mouse > Create > Anim Blueprint

Opne AnimBP > Class Settings > class options > Parent Class : Vehicle Animation Instance

Mesh Space Ref Pose: this is used to return the mesh space reference pose for our skeletal mesh in the Animation Blueprint
Wheel Controller : offloading a lot of the work in creating these types of animations, you can use the Wheel Controller Node to drive the animations.

GO to BP_Car
Select Mesh > Animation > Anim Class : AB_Car

Play game
Result

Youtube Tutorial:
教學專案和文件下載 / Full Project and Document Download:
Sketchfab - Car Scene:
How to Set up Vehicles Unreal Engine 5.0
贊助 / Support Me
BuyMeAcoffee: https://www.buymeacoffee.com/lutopialab
Patreon: https://www.patreon.com/LutopiaLab/
#ChaosPhysics #car #UnrealEngine5 #教學 #虛幻引擎 #車子#Vehicle #Drive
Comments